Have you ever gazed at a sketch and wondered how it pops off the page? You’re not alone! It’s all about mastering light and shadow, a tricky but crucial skill for any artist. Don’t worry; you’re in the right place to learn the magic of line art and shading. Let’s dive into the secrets of single-source lighting, explore cast shadows, and experiment with hatching techniques. Ready to bring your artwork to life? Let’s get started!
Importance of Understanding Light Logic
While mastering the art of shading, it’s crucial to understand light logic, as it greatly influences how you’ll depict three-dimensional forms and their cast shadows. Light logic is essential in creating lifelike drawings. It’s not just about proportions, perspective, or composition. Tone and light are fundamental. They take your drawings from flat to complete, from dull to dramatic. Don’t just rely on your pencil to do the heavy lifting. Let light do its job.
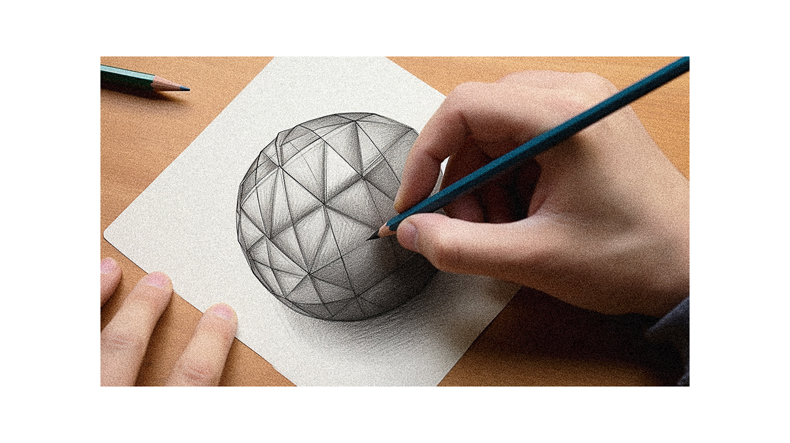
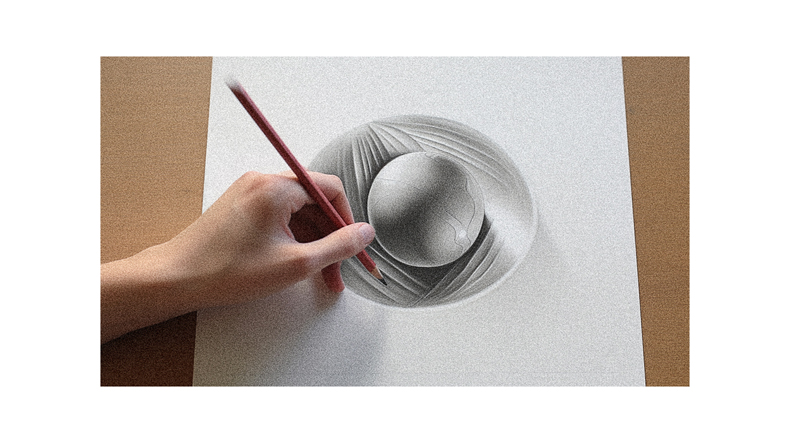
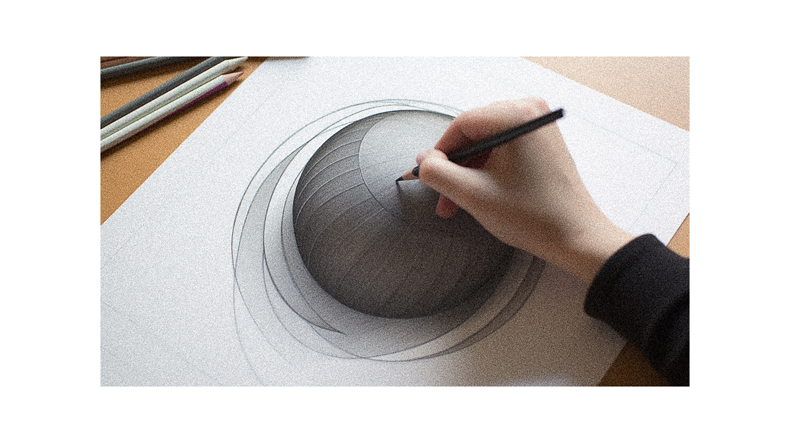
You might find it hard to set up a dramatic lighting scenario at home, but don’t let that stop you. Start by using a single, hard light source. It’ll help you understand light and shadow better. Apply these principles to a simple sphere, making them easier to apply to more complex shapes. Remember, understanding light logic is the first step to mastering shading.
Using a Single Light Source for Learning Light and Shadow
You’ll find that using a single light source can significantly simplify your understanding of light and shadow in your art. It eliminates complexity, allowing you to focus on how light interacts with objects. This approach can help you develop a strong foundation in light logic.
- Benefits of a single light source:
- Simplifies tonal values: You’ll easily distinguish between light and shadow areas with just one light.
- Enhances form: It brings out the three-dimensionality of your subject.
- Practical steps:
- Choose a simple object: Begin with a basic shape, like a sphere or a cube.
- Set up your light: Position it at varying angles to see how shadows change.
Light Logic and Cast Shadows
Mastering light logic and understanding cast shadows are fundamental skills in creating realistic drawings. You’ll find that light always travels in a straight line, and shadows directly respond to the light’s angle and intensity. For instance, a cube will create a square-shaped shadow, while a sphere will create an ellipse-shaped one.
Pay attention to the intensity of your light source, as it directly affects your cast shadows’ characteristics, including edge sharpness and darkness. Remember, shadows start soft and become softer as they move further away from the object. They can also be altered by levels or surfaces they encounter. It’s essential to check if your shadow shapes logically fit with your subject and lighting. Remember, consistency in your light source’s direction is key.
Alterations in Cast Shadows
In your art, it’s important to note that the cast shadows can change and become softer as they move further away from the object. This softening is due to light scattering and the influence of other objects in the environment. It’s not just the proximity that can alter your shadows.
The manipulation of shadows is key to enhancing the depth and realism of your artwork. Here are some points to consider:
- Understanding Shadow Alteration:
- Be aware of the light source’s direction.
- Consistency in the light source’s direction is crucial.
- Recognize how other levels or surfaces in the path can alter shadows.
- Practical Application:
- Check if shadow shapes logically fit with the subject.
- Ensure the shadows convincingly portray the illusion of form.
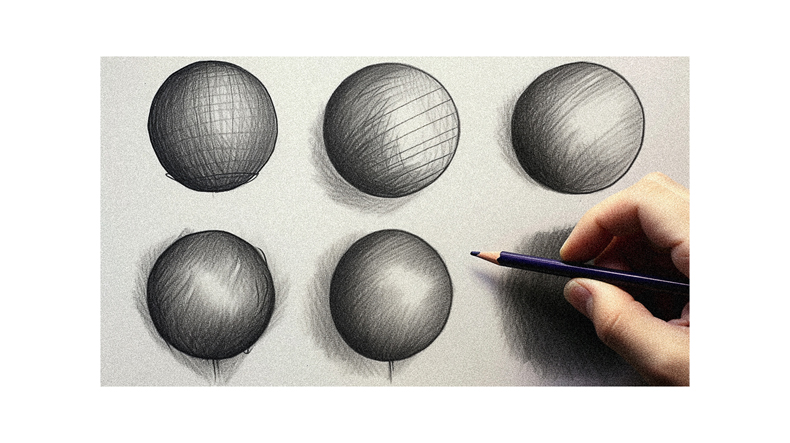
Three Areas of a Form
You must understand three essential areas in a form: the light side, the shadow side, and the cast shadow. The light side, often the most visible part of your subject, consists of the highlight and halftones. It’s where the primary light source strikes directly.
The shadow side includes the form shadow, the core of the shadow, and reflected light. It occurs where light doesn’t hit directly. Lastly, the cast shadow, often overlooked, is vital for grounding your object. It’s the dark area that the form blocks from receiving light. Understanding these three areas will help you create more realistic renderings. Remember, grasping this isn’t about mastering drawing but learning to see. Keep practicing; you’re doing great!
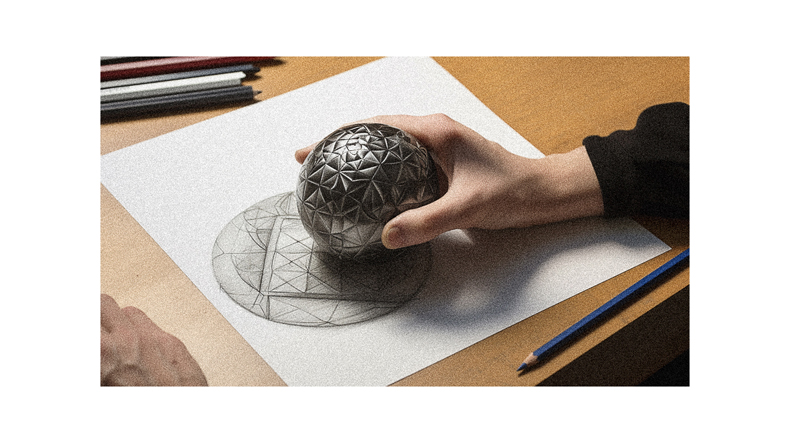
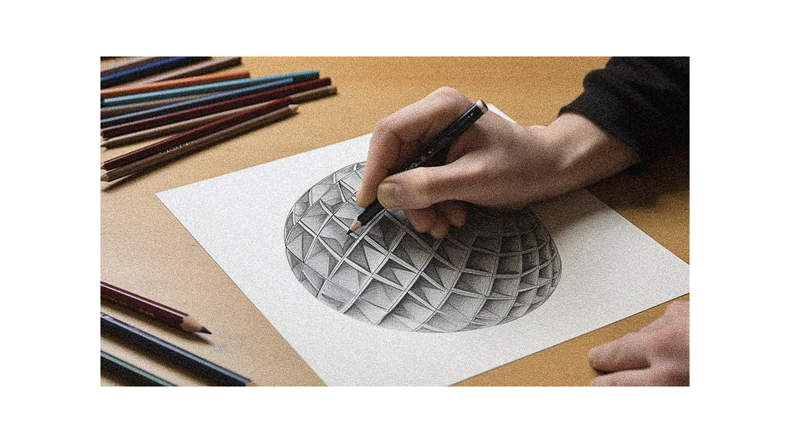
Hatching
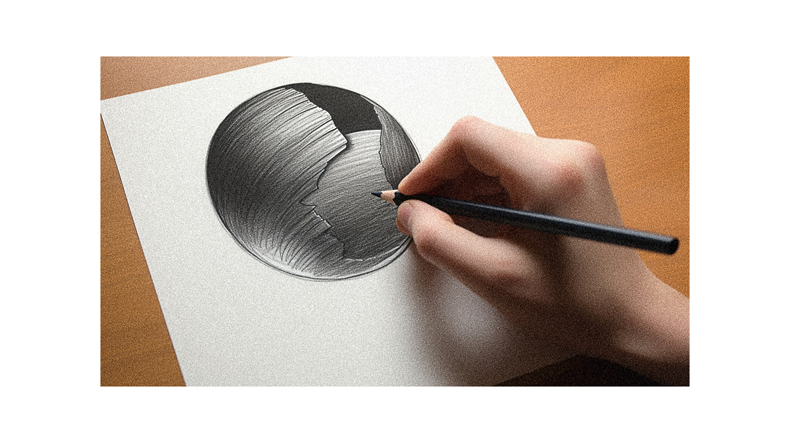
You must remember that hatching involves using a series of lines in just one direction, and it’s a popular shading technique you can use to shade virtually anything. It’s all about the angle and pressure of your pencil strokes.
Here’s a quick guide to get you started:
- General Techniques:
- Angle your pencil down for thicker strokes
- Use unblended lines for shading materials like steel or wood grain
- Shading Tips:
- Lighten your lines in the light areas
- Darken your strokes in the shadowed areas
Mastering hatching can give your artwork a sense of depth and texture, creating a more realistic representation. So, grab your pencils and start practicing. You’ll be amazed by the effects you can achieve.
Cross Hatching
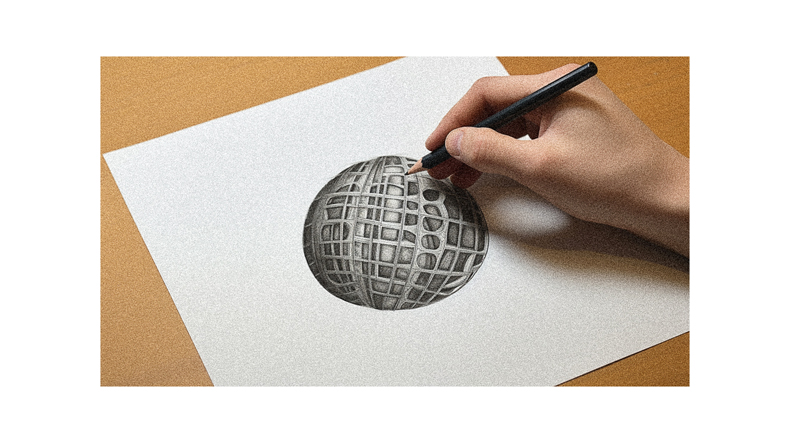
When it comes to cross-hatching, it’s all about overlapping lines at various angles, which can help you create depth and texture in your artwork. You’ll find it’s an excellent technique for drawing fabrics and textured skin. The trick is to lighten your lines for lighter areas and darken them for shadowed areas.
This creates a patterned effect that provides a unique depth and texture. It’s not just about the texture, though. Cross-hatching also helps you control the tone of your artwork. Remember, practice makes perfect. Start by drawing grid lines on paper and then cross hatch within each square. Experiment with different angles and pressures until you get the desired effect. You’re on your way to mastering cross-hatching!
Circulism
In the realm of art techniques, you’re now diving into circulism, a method involving overlapping circles, and it’s perfect for creating smooth textures like those found in fuzzy fabrics or realistic skin. The beauty of circulism lies in its simplicity yet the profound results it offers.
Circulism can be broken down into two key aspects:
- Technique
- Always use sharp pencils for textured skin and blunt ones for smooth skin.
- The circular motion of your hand plays a crucial role.
- Application
- It’s perfect for drawing realistic human skin, as it creates a unique texture that’s hard to achieve with other techniques.
- Though it’s a bit time-consuming, the results are well worth the effort.
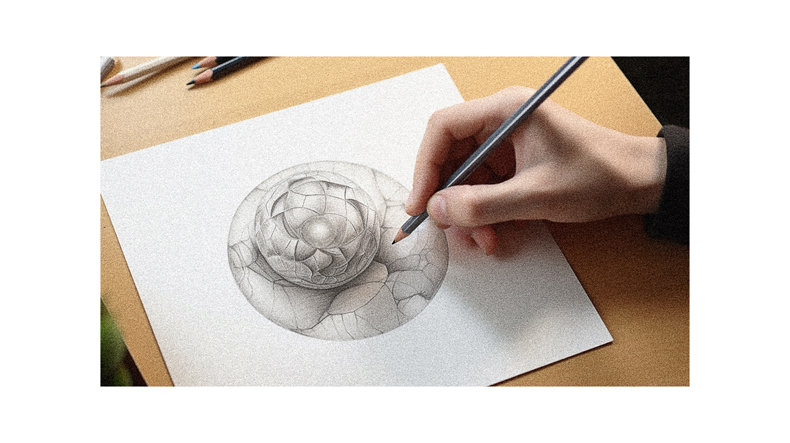
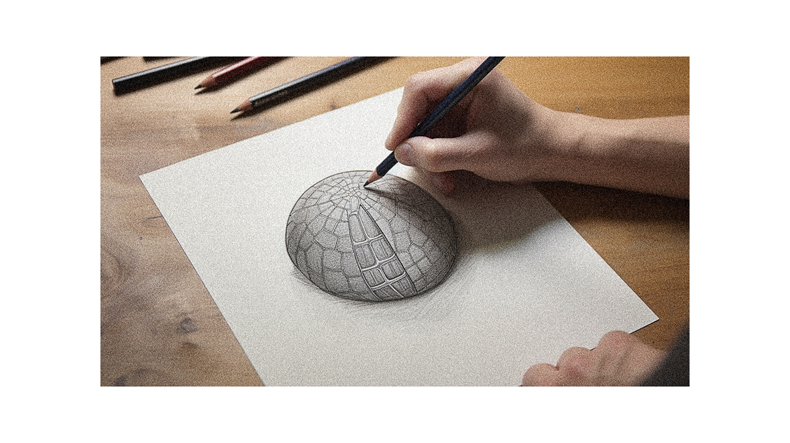
Contour Shading
Shifting from circulism, you’re now exploring contour shading. This technique involves drawing lines that follow the contours of your subject, and it’s a fantastic method for adding depth and dimension to your artwork. Like hatching and cross-hatching, contour shading requires you to visualize your object in 3D, which may challenge your imagination, but it’s worth the effort.
You’ll notice a significant improvement in the form and texture of your 2D drawings. It’s a technique that can make your artwork pop, providing a sense of realism. Don’t hesitate to combine contour shading with other techniques. For instance, apply circulism for a base layer and consistent texture, and then use contour shading for areas where the skin appears stretched. The results will amaze you.
Combine Shading Techniques

You’ll find that mixing up various shading techniques in a single drawing can add a whole new level of depth and texture to your artwork. It’s quite normal to use multiple techniques in one piece. For instance, you might use:
- Circulism for creating a base layer and consistent texture.
- Using a sharp pencil can enhance textured skin.
- A blunt pencil is ideal for smooth skin.
- Contour shading for areas like stretched skin.
- This requires you to visualize the object in 3D.
- It’s great for adding depth and dimension.
- Hatching for details like nails and stretched skin.
- Angle your pencil down for thick strokes.
- Cross-hatching for creating patterns and deep valleys.
- This technique is perfect for fabric textures. Combining these techniques can help you create a variety of textures, like wrinkled skin.
Follow us on Pinterest for more tips, tutorials, and artist reviews!