Mastering perspective will make a huge difference to your art if you’re a beginner artist. So, this guide to the two-point perspective should help you draw with greater accuracy.
Drawing in perspective is essential to making your art look realistic. But if you’ve been confused about how to do 2 point perspective, don’t worry. It’s a little tricky at first, but you’ll soon get the hang of it.
I’ll guide you through a step-by-step 2-point perspective drawing of a cuboid, as it’s one of the simpler shapes. Then, you’ll be able to use this exercise for your own artwork.
The more you practice, the easier it will become. And soon, you’ll feel confident drawing anything using the two-point perspective.
What is Two Point Perspective?
Two-point perspective drawing uses the linear perspective to draw things in proportion. This means you’ll draw a horizon line and vanishing points to mark out your design. Then, you’ll be sure to create an accurate drawing that looks right on the page.
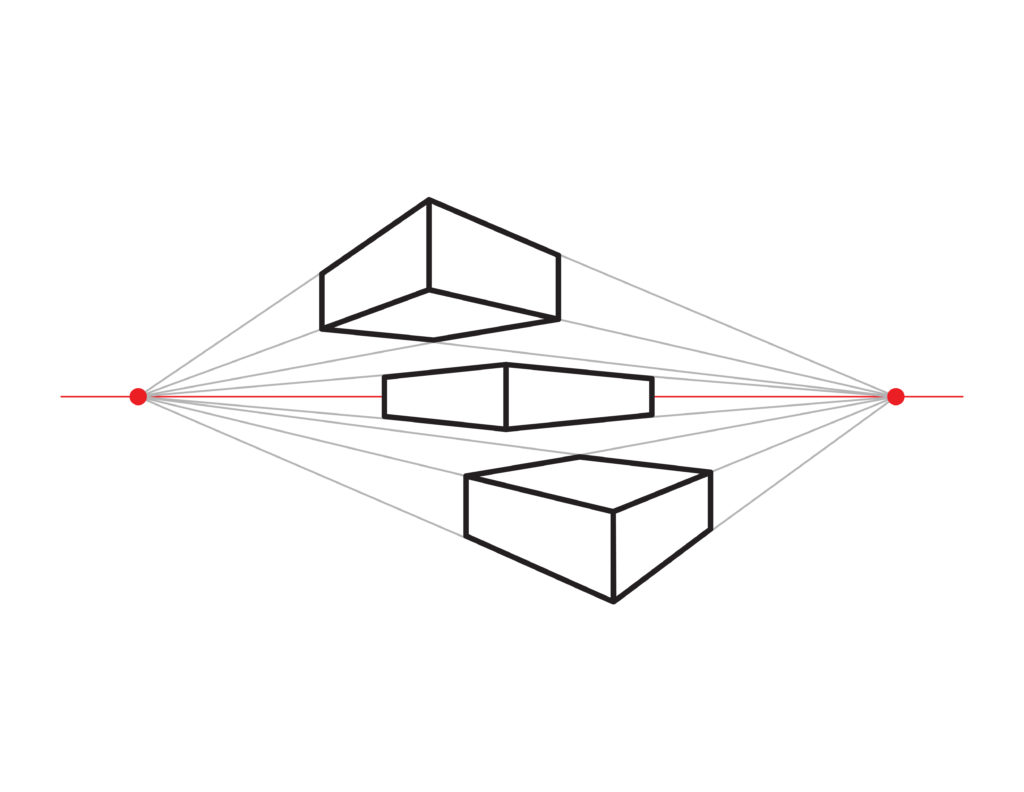
Two-point perspective uses geometry to map out the shapes you want to draw. It’s especially useful if you want to draw regular shapes like buildings. It also comes in handy when drawing the interior of a room in the correct proportion.
Perspective is a challenging thing to imagine and get right freehand. So, you’ll find that a two-point perspective is invaluable for these kinds of drawings.
Once you know how to handle perspective, you can concentrate on the finer details. And as a result, you’ll become a much better artist overall.
Want to find out more about perspective? Check out these must-read perspective books for artists.
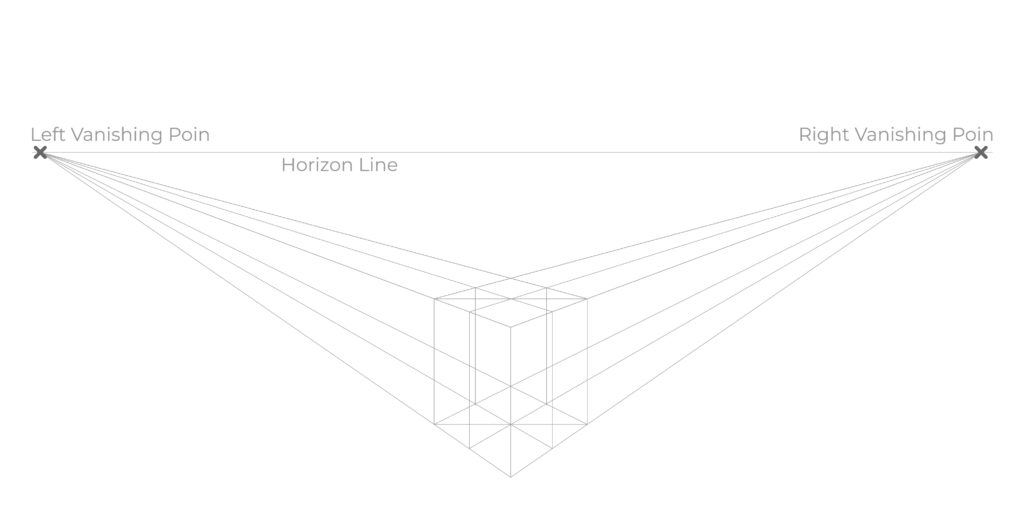
When doing a 2-point perspective drawing, you start by marking your horizon line. Then, you decide on your vanishing points; you’ll have two for a two-point perspective drawing.
Once you have your vanishing points, you can create guidelines (or vanishing lines). These will guide you on where to draw, and you can rub them out when you have the finished piece.
Now, let’s move on to how to do a two-point perspective drawing step by step.
Two Point Perspective Drawing Tutorial: Step by Step
Here’s a simple 2-point perspective drawing tutorial for you to follow. Once you’ve mastered this basic 2-point drawing, you can take it to the next level.
For example, if you want to learn how to draw two-point perspective buildings step by step. This technique still applies, so you can follow the same steps.
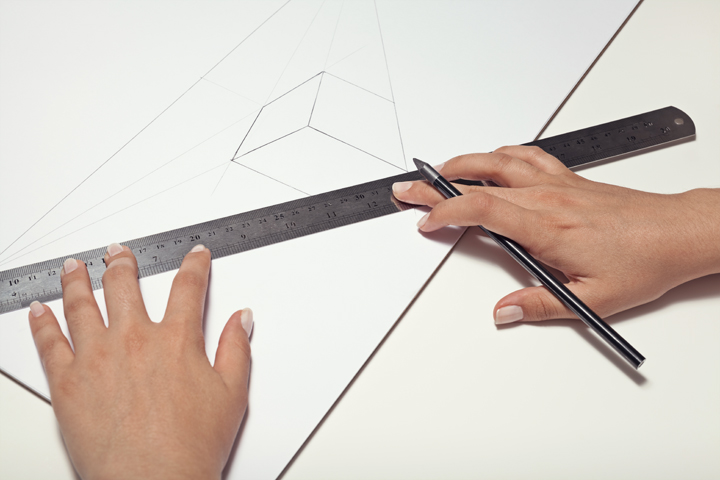
I’ve included instructions and diagrams you can use to keep track of where you are. I would also recommend color-coding your lines. For example, draw your vanishing lines in one color. Then, pick a different color for the lines that make up your cuboid.
Step One: Draw the Horizon Line

Two-point perspective: Step 1
Before you get started on your two-point drawing, you’ll need your horizon line. Everything else depends on it, so you need to start here.
You can draw a basic horizontal line across your paper near the top of the page. Make sure you leave enough space below for your design.
(If you’re drawing a building on the horizon line, you can move the line lower down. It will probably work better if it’s closer to the middle of the page. Again, this will depend on what you’re drawing).
Step 2: Mark Your Vanishing Points
Two-point perspective: Step 2
Once you have your horizon line, you can add on your vanishing points. You’ll use these vanishing points to create your vanishing lines that will guide the rest of the drawing.
You should have one vanishing point on the left-hand side and one on the right-hand side. In this way, your cuboid will be in the center of the page between the two.
Step 3: Draw the First Vertical Line of the Cuboid
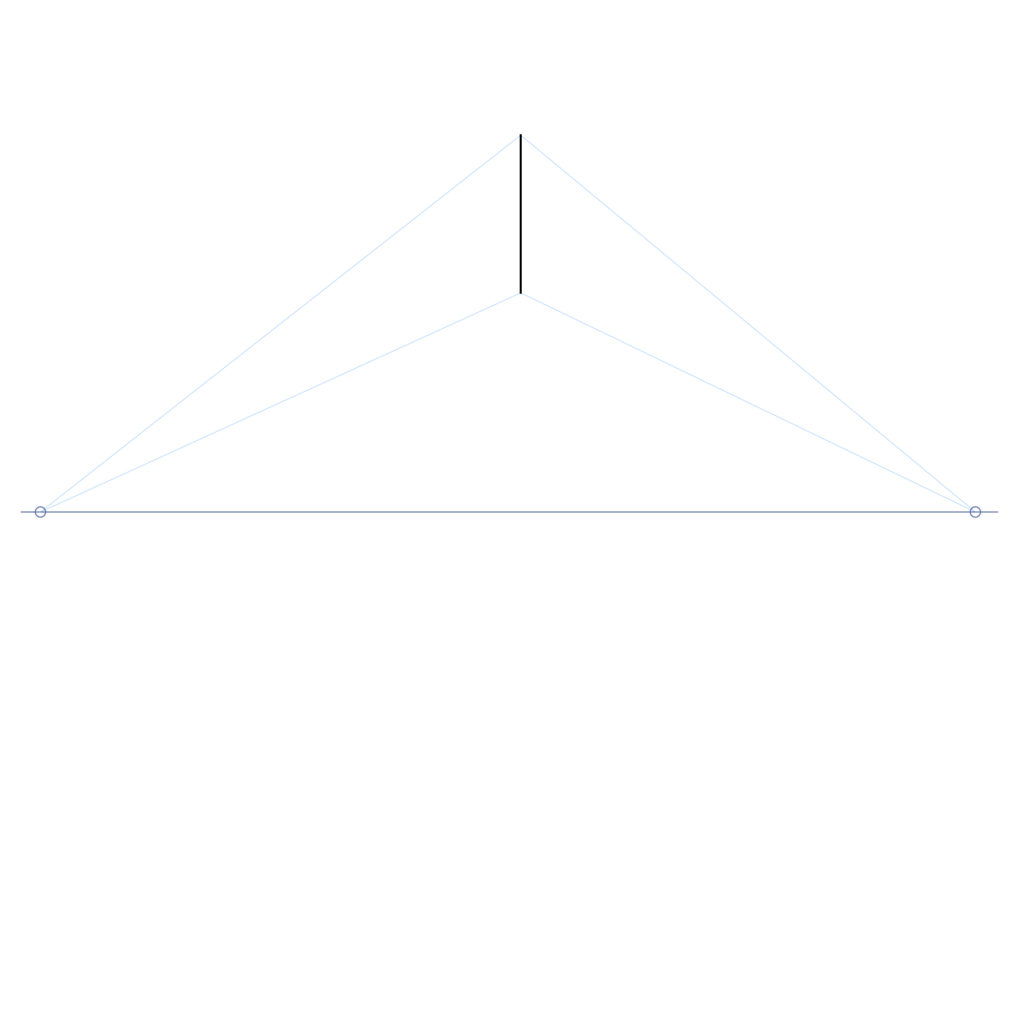
Two-point perspective: Step 6
Now you have your horizon line and vanishing points, and it’s time to make a start.
First, you’ll need to draw a vertical line a little lower down on the page, below the horizon line. This will be one of the corners of your cuboid. You can choose how tall you’d like your shape to be.
Step 4: Draw your first Vanishing Lines
Two-point perspective: Step 4
Next, it’s time to sketch your first vanishing lines. Sometimes, you’ll see vanishing lines referred to as receding lines, but it means the same thing. But that’s helpful to know, so you don’t get confused!
You’ll actually need to draw two vanishing lines from each vanishing point. So, you should have four vanishing lines in total.
First, draw a line that meets the top of your vertical line from your first vanishing point. Then, draw a second line from the same vanishing point to the bottom of your line.
Once you’ve done this, you can repeat it on the other side. You’ll need to draw a line to the top and bottom of the vertical line from the other vanishing point.
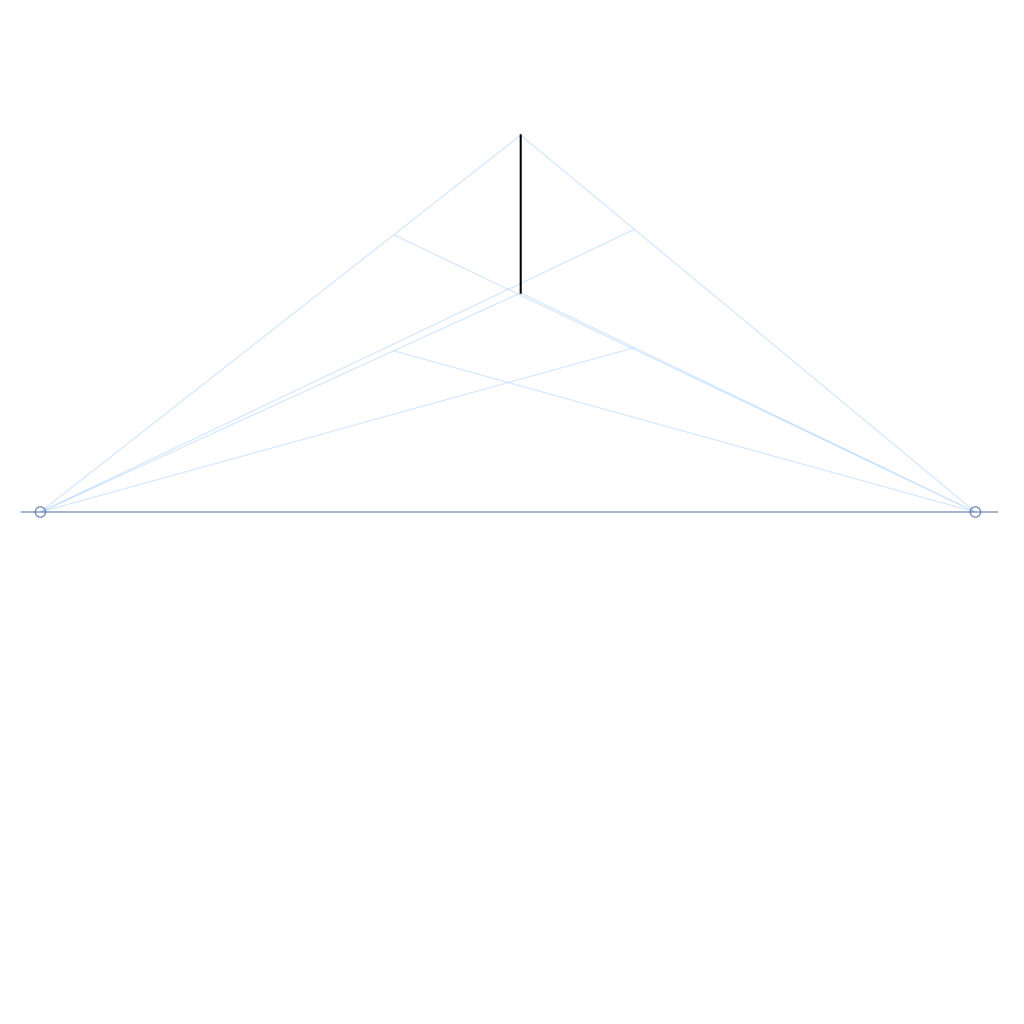
Step 5: Draw the Next Two Vertical Lines of the Cuboid

Two-point perspective: Step 5
Now that you have the vanishing lines, you can decide how large you’d like the cuboid to be. Let’s start with the left side. All you need to do is draw a vertical line between the vanishing lines at your desired point.
Then, do the same on the other side. Decide whether you want it to be the same length or differ from the left-hand side. And then, draw your vertical line from one vanishing line to the other.
You’ll start to see the shape appearing before you, although it’s not complete yet.
Between your vertical lines, your vanishing lines will make up the top and bottom edges of the cuboid.
Step 6: Draw another Vanishing Line from each Vanishing Point to the Far Vertical Line

Two-point perspective: Step 6
Now, you need to add another couple of vanishing lines to create the remaining top edge of your cuboid. Draw a line from your left-hand vanishing point until it meets the vertical line on the right.
Then, draw a line from the right-hand vanishing point. Keep going until it meets the top of the vertical line on the left. And now, you’ve mapped out the top of your shape with all four sides in place.
Step 7: Tidy Up Your Drawing
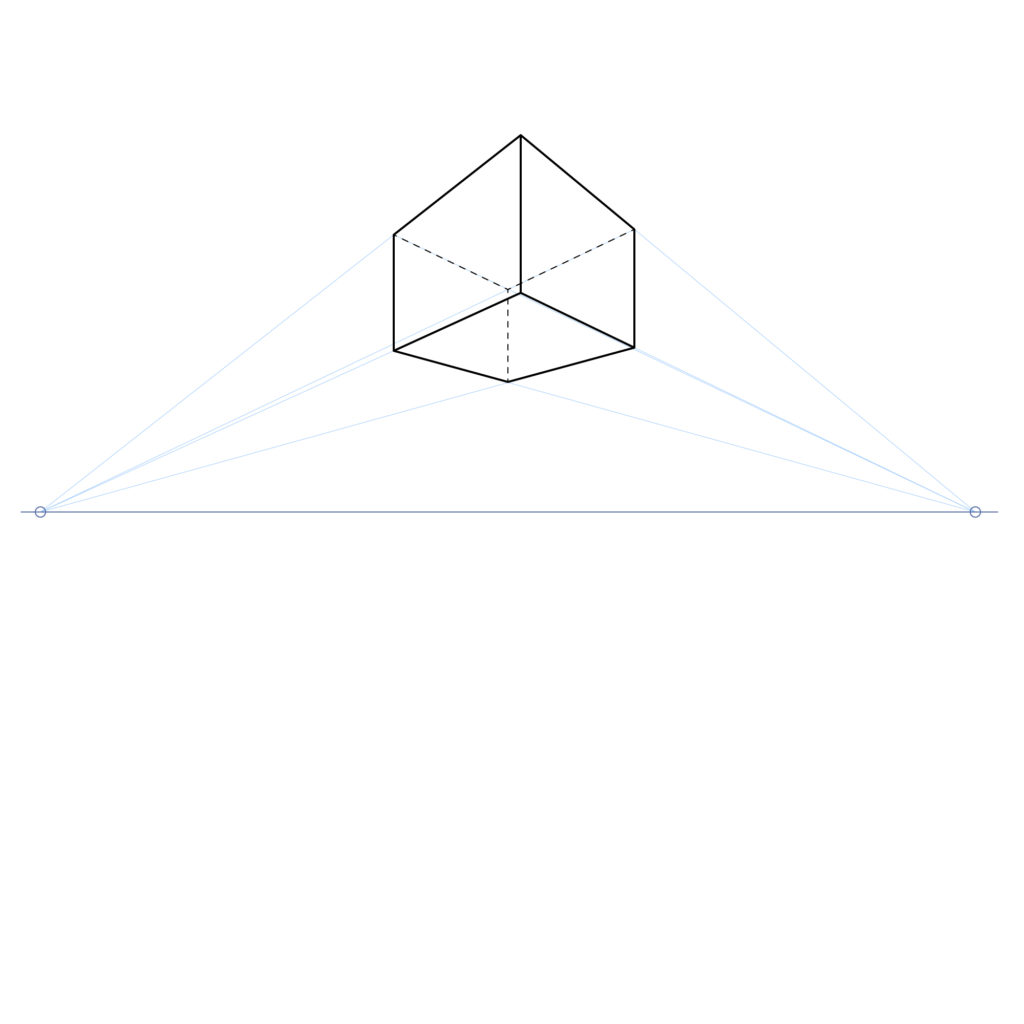
Two-point perspective: Step 7
Congratulations – you’ve drawn a cuboid using the two-point perspective method! Now, you can tidy up your drawing by erasing the extra vanishing lines.
Extra Tip #1: Finding the Perspective Middle of Your Shape

So, you’ve completed your basic cuboid, and now you know how to use the two-point perspective method. But there may be times when you want to find the middle of a 2-point perspective drawing, which can be tricky.
That’s because when using perspective, your design actually gets smaller towards the back. That’s what makes it look accurate and in proportion to the eye.
So, you can’t just measure halfway down the shape and get the true perspective middle. But there is a trick you can use instead! All you need to do is draw diagonal lines from one corner to the other on one side of your cuboid.
Draw a vertical line through the point where your lines meet, and you’ll have the perspective middle. That comes in handy if you want to add more details to your drawing. For example, if you’re drawing a house, you’ll need to add a door and windows.
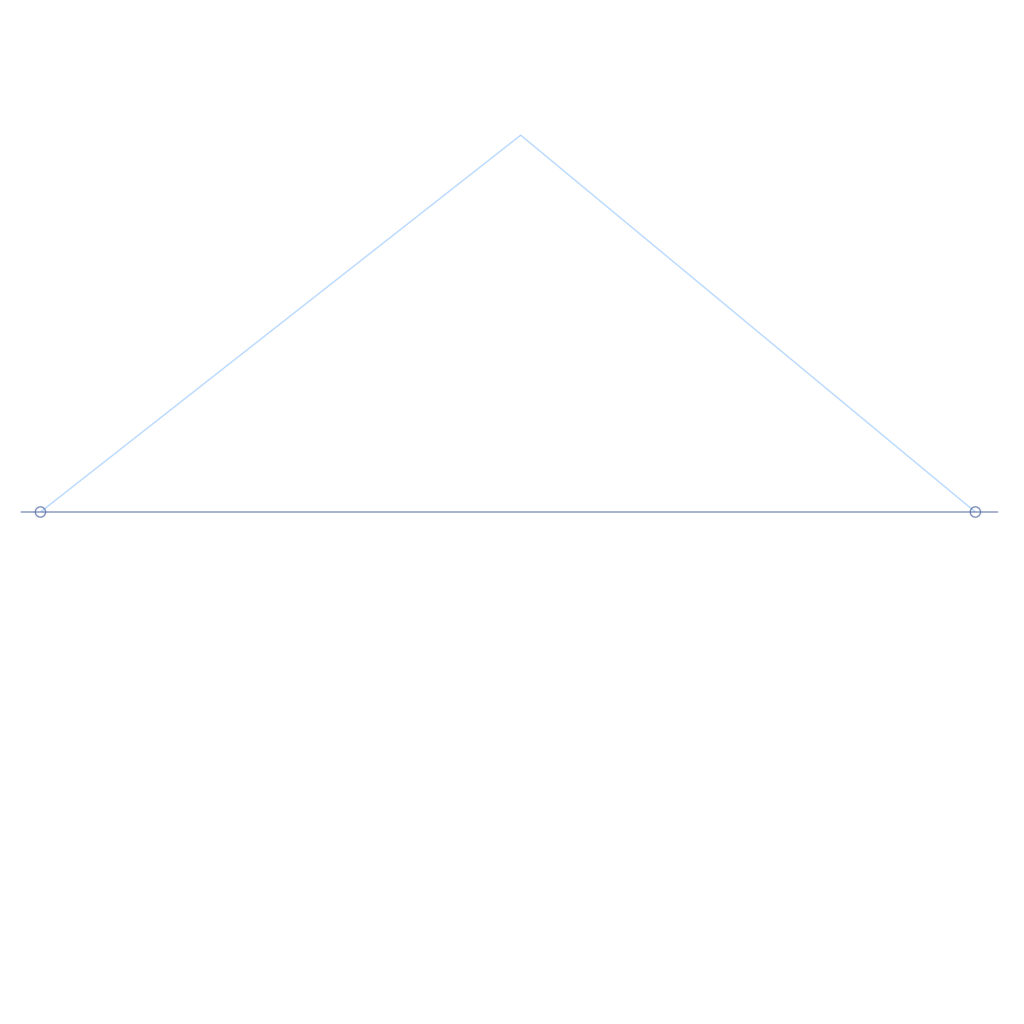
Extra Tip #2: Adding a Roof to a Building Using Two Point Perspective
You can use the same technique if you want to add a roof. Again, you’ll need to find the middle point in perspective so that your roof looks accurate.
Draw your diagonal lines from corner to corner and create your vertical line. The taller the line extends, the steeper your roof will be. In contrast, a shorter line will make your roof flatter and shallower.
Once you have the tip of your roof, you’ll need to draw another vanishing line. It should connect your vertical line for the roof to the vanishing point on the opposite side. This vanishing line will make up the top edge (or ridgeline) of your roof.
On the back of the house, you’ll need to sketch in the walls you cannot see. Then, you can find the perspective middle on that side. Next, draw the vertical line upwards until it meets the top edge of the roof.
And finally, you can join up the remaining corners with the ridgeline in a straight line. This will make the sloping edge of your roof.
Now, you’ve drawn an entire building using a two-point perspective. It seems a little tricky at first, but soon, you won’t even need to think about how to do it.
The Wrap Up
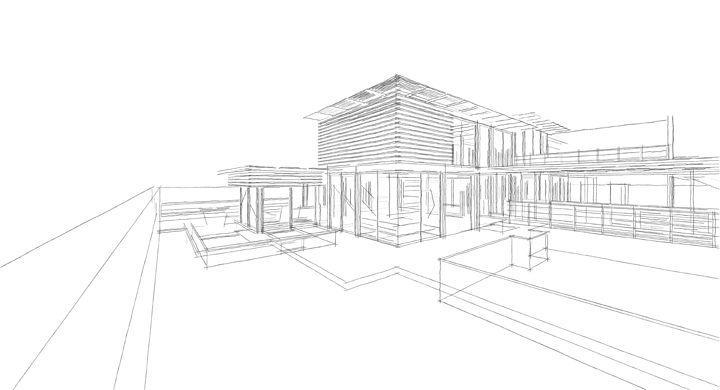
Now, you should have a good idea of how to use the two-point perspective method in your drawings. You’ve created a basic cuboid, but you can also use it to draw much more advanced shapes.
Why not have a go at drawing a street of houses using two-point perspective. While it will be challenging, you can just use the same method explained above. Break it down and take it step by step, and you’ll find it’s much easier than it seems at first.
The more practice you get, the quicker you’ll master it. And then, you can move on to more advanced skills like the three-point perspective.
Let me know how you got on with your first perspective drawing tutorials! And if you have any questions, you can post them below.
Follow Proactive Creative on Pinterest for more arty tips, reviews, and tutorials!