So you want to know how to get into digital art, but you don’t know where to start. Then, this guide is for you!
Digital painting is an exciting prospect for complete beginners and traditional artists alike. It’s less messy and more accessible than traditional art. You can create amazing designs with a smaller learning curve than other mediums.
But it’s also a big step to get started, and a lot of resources aren’t beginner-friendly.
You’re interested in digital painting, but you have some questions and worries, too. For example, what tools you need to get started. Can you use your laptop, or do you have to buy other gadgets and software?
Or, you’ve been wondering, how long does it take to get good at drawing digitally?
Don’t stress! I understand how overwhelming it is when you’re starting. In this guide, I’ll share how to get started with digital art and break it down, so it feels achievable.
The good news is that you need very little to get started. The essentials are something to draw on like a tablet or graphics tablet or your computer. Pair it with drawing software, and you’re good to go!
Digital tools give you shortcuts to speed up the process and create amazing art in less time. But it’s still highly skilled, and you’ll need to work at it to become adept.
Here’s my in-depth introduction to digital painting for beginners. It covers everything you need to know, from the software to the tools and tips to get you started.
If you want to learn how to paint digitally, read on.
Digital art supplies to get started with digital painting
First of all, I’ll explain the essential digital art supplies you’ll need. It’s possible to learn how to do digital art on any budget, so you can choose what works for you.
Choosing Your Hardware and Digital Art Supplies
You have some options when it comes to hardware for digital art. You can choose between a graphics tablet, a display tablet, or a standalone tablet.
For both a graphics tablet and a display tablet, you’ll also need a computer. So, you’ll need a great monitor too.
I’ve recommended some of the best products below and linked them to more detailed reviews. Plus, I’ll share some of the essential factors to look out for when shopping around.
Computer
A decent computer is vital for digital art, as you’ll need it to power your drawing or pen display tablet. Some artists also choose to draw on a laptop, especially if it has a touchscreen.
You can also edit your designs on your computer, upload them to social media, or sell them online.
Some factors to look out for include:
- Lots of storage space for your artwork
- A fast and powerful processor
- A good RAM – at least 8 GB but ideally 12+ RAM
- A high-resolution display
- A dedicated GPU, if possible
That all sounds a lot to consider, I know. But don’t worry. Check out my recommendations for the best laptops for artists here. I’ve saved you the hard work and research and pulled together the laptops that fit the criteria.
Prefer to use a desktop computer? Here are my reviews of the best desktop computers for artists and designers. And if you want portability and power, these desktop replacement laptops are perfect.
Monitor
When you’re making digital art, you’ll want to see it in detail. So, you’ll need a good quality monitor, especially if you’re working on a graphic tablet.
If you already have a good monitor, then you won’t need to replace it. But if you’re relying on your laptop screen, then it’s time to upgrade.
While there are many monitors out there, not every model is suitable for digital painting. You should look for a large screen with high-definition and true-to-life colors.
A wide color gamut is also important, so your paintings look vivid and bright. Here are some of the best monitors for digital art and graphic design. You won’t go wrong with any of these specialized monitors.
The general rule is the bigger, the better. Look for a screen measuring 20+ inches to cut down on eye strain and fatigue. Plus, your designs will look incredible on a large display.
Tablets
Most digital artists prefer to use a tablet for digital art, as it allows you the best control over your designs. But with tons of options, which tablet should you get for digital drawing?
There are three main types of tablet:
- Graphic Tablets
- Pen Display Tablets
- Standalone Tablets
Each type has pros and cons, so I’ll explain the differences and help you decide which one to choose.
Graphic Tablets
First of all, the graphic tablet. This is the cheapest option available, but it’s also a little basic.
Graphic tablets don’t have a screen. Instead, you’ll draw onto the active drawing area and see your design on your computer monitor. As a result, there’s quite the learning curve to get used to a graphic tablet.
Some graphics tablets will have extra features like shortcut buttons and advanced controls. Plus, they are super sensitive and responsive. So, if you can get used to drawing while looking at another screen, they are an excellent choice.
Although graphic tablets are pretty compact, they aren’t portable or standalone. You’ll have to use it at your desk, connected to your computer.
Most graphics tablets are durable and hardwearing, so they can last for years. If you’re looking for an affordable tablet specifically for drawing, then it ticks all the boxes.
Display Tablets
The next step up from a graphic tablet is a pen display tablet. One of the most well-known examples is the Wacom Cintiq.
These tablets are slightly more expensive but have the huge bonus of a screen. So, you can see exactly what you’re drawing, and it feels more intuitive.
But like the graphic tablet, a pen display still needs to connect to your computer to work. They don’t function alone, and it’s not a portable option.
Many artists choose these as they are more user-friendly, and it’s easy to make corrections. Check out my recommendations of the best drawing tablets with a screen to take your pick.
Standalone Tablets
More people are switching to using a regular tablet (aka a tablet computer).
You can use a standalone tablet like an iPad Pro for drawing. Just download your favorite drawing app, and you can create on the go.
The best thing is that they are versatile, portable, and multifunctional. Many recent tablets have incredible screens, so your digital art will look amazing.
But there are some downsides to using a regular tablet for digital painting. As they aren’t designed solely for this purpose, they aren’t as specialized. For example, they may not be as sensitive, and there could be a larger gap between your stylus and the screen.
You should check whether your preferred app will work on the tablet before you buy. Not all software is compatible with every tablet.
There’s also the price to consider. These tablets tend to be more expensive than all but the most premium drawing tablets.
You may also need to buy a stylus separately, so factor that into your budget. The stylus should have pressure sensitivity for the best experience and control.
But these tablets are appealing due to their portability and versatility. If you want an all-in-one gadget for everything, check out the top standalone tablets here.
Scanner
A scanner is another helpful tool for digital art, although it’s not essential for every artist. It can come in handy if you want to start a sketch by hand and transfer it to your drawing software. Then, you can combine traditional and digital art for a new and fresh result.
Another benefit of a scanner is that you can create background layers for your artwork. You can scan in paper textures or add hand-drawn textures.
The best scanners are fast, quiet, and durable. But most importantly, they should produce high-resolution images. Here are my recommendations for the best scanners for artists.
But if you’re on a budget, you can skip the scanner altogether for now!
Camera
You’ll need a good camera to photograph your artwork. That becomes essential if you want to sell art prints or upload your artwork to social media. Here are some of the best cameras for photographing your artwork.
You can also upgrade your tools and hardware over time as you become more experienced. You don’t need all the tools and supplies when you start with beginner digital art.
But if you want to make money from your digital art, you may want more powerful tools. If that’s the case, you can invest more over time when you know exactly what you need.
Digital Painting Software
There are tons of digital painting software and apps to choose between. You’ll find both free and paid options available for Mac and Windows.
You don’t need to invest in expensive software when you’re getting started. You can go for a cheap or free option while you get used to digital painting.
Each software comes with a learning curve, but most of the skills are transferable. You may need to find out specific shortcuts if you start using a new app. But once you master one digital painting software, it shouldn’t be tricky to use a different one.
As most programs offer a free trial, you can test out the software and see what you enjoy using. A lot of it comes down to personal choice, so having a trial run is the best way to find the right drawing app for you! You can also watch digital art tutorials to help you get started.
Choosing the right one is entirely up to you. Keep your budget in mind – you don’t have to overstretch yourself. Anyone can get started with digital drawing.
Here are some of the best digital art software around right now!
Adobe Photoshop
This iconic program is one of the most common among digital artists. It’s considered the industry gold standard for professionals. But beginners can use it, too.
Photoshop provides you with a vast range of editing tools, textures, and brushes. It’s a powerful program with an active community, so you can get support if you have any questions.
While Photoshop is one of the most powerful apps around, it’s a bit complex. But you’ll find a digital art tutorial for almost anything you can do in Photoshop!
For example, check out this beginner’s guide to digital painting in Photoshop.
But it’s not the cheapest option as it’s only available on a subscription model. You’ll need to pay every month to use Photoshop. So if you’re on a tight budget, read on for more free and cheap drawing apps.
Affinity Photo / Designer
Affinity is a new kid on the scene, as it was only released in 2015. But it’s also much cheaper than Adobe and offers a free trial, so you can test out the apps.
You can use Affinity Photo for all your photo editing needs. While Affinity Designer is perfect for digital painting, drawing, and illustration.
Affinity is user-friendly and great for beginners, as it’s not so complex as Photoshop. It’s also much cheaper at just $24.99 for a one-time payment.
With tons of features, Affinity is the best affordable alternative to Photoshop.
Krita
If you’re looking for a free, open-source program, check out Krita. It’s ideal for beginners and intermediates, with lots of brushes and textures to choose from.
It’s not as robust as Photoshop, so you may find it lacking if you’re an experienced artist. Another downside is that the choice of digital paint tutorial for Krita is a bit limited.
But it’s fine when you’re just getting started. Krita is one of the best free apps for digital painting and drawing, making it perfect for beginners on a budget.
Procreate
iPad Pro users, listen up. You need to check out Procreate! It’s the top option for iPad pro as it’s very affordable at $9.99 for a one-time payment.
What artists like about Procreate is that it’s simple and user-friendly. There’s a minimal learning curve, so it’s a great place to start for beginners.
It doesn’t have the same range of features as Photoshop yet. But the creators continue to work and add new tools all the time. Plus, you can find free and low-cost brushes when you want to try out new digital painting styles.
Gimp
Gimp is another free open-source program. It resembles Photoshop, although the user experience isn’t so smooth. This app takes some getting used to, as the interface is a little confusing and sometimes buggy.
If you’re looking for a free tool, you can try using Gimp. You can do a lot with this software if you put in the time to get used to the shortcuts and interface.
Clip Studio Paint Pro
Clip Studio Paint Pro is another fantastic option for digital illustration and sketching. It’s especially great for creating comics, including by professionals.
This app has a lot of potentials and is suitable for beginners up to experts. You can start with simple drawings and work up to complex designs as you gain experience. All within the same app.
Artstudio Pro
This low-cost app costs just $11.99 and is available on Mac and iOS. Artstudio Pro is versatile, offering everything from digital painting to photo editing.
This feature-packed app has hundreds of brushes, gradient tools, fonts, patterns, and more.
Artstudio Pro has a streamlined interface that doesn’t feel cluttered. And while the app can be a bit slow at times, it works well overall.
Corel Painter
Last but not least is Corel Painter. It’s powerful, and the latest update brought lots of new, streamlined features. It’s easy to use and suitable for any artist, including professionals.
Corel Painter isn’t cheap at $429, so it will appeal most to more experienced artists. But the one-time payment is often preferable to an expensive ongoing subscription. If you want the power of Photoshop without the commitment, try out Corel Painter’s free trial.
Brushes
Although digital painting programs have built-in tools, you can buy extra brush packs. That’s handy if you want to try a new digital painting technique.
Brush packs tend to be affordable and provide you with exciting new tools to work with. I’ve rounded the best free and low-cost Procreate brushes here. There’s a great list of the best Photoshop brushes here. Take a look and see if you can find any bargains!
How to Create Your First Digital Artwork
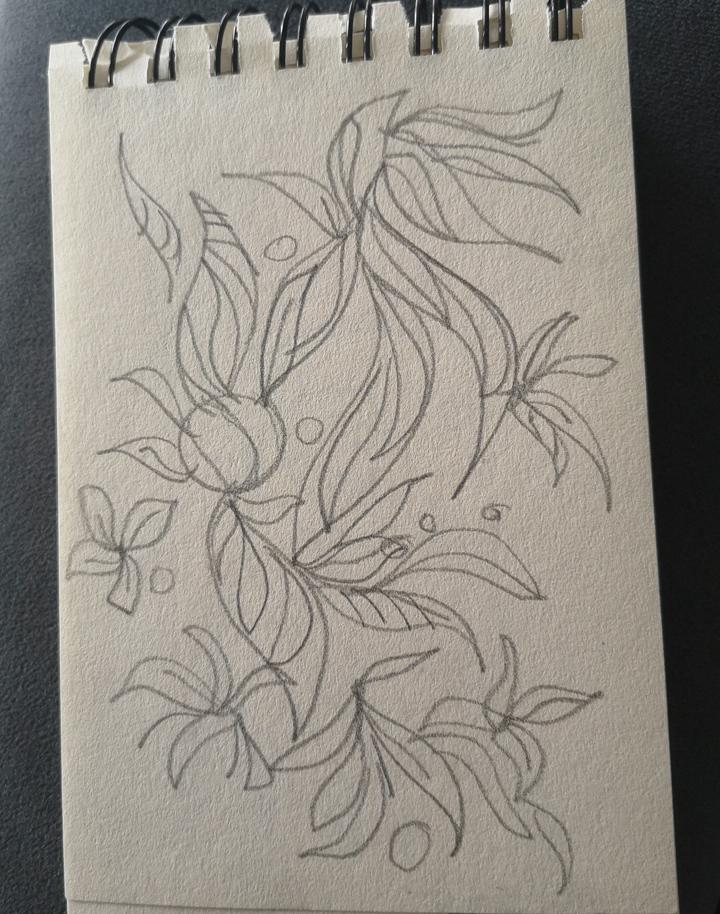
Sketch out your idea on paper
(Image: Outmane Amahou / Proactive Creative)
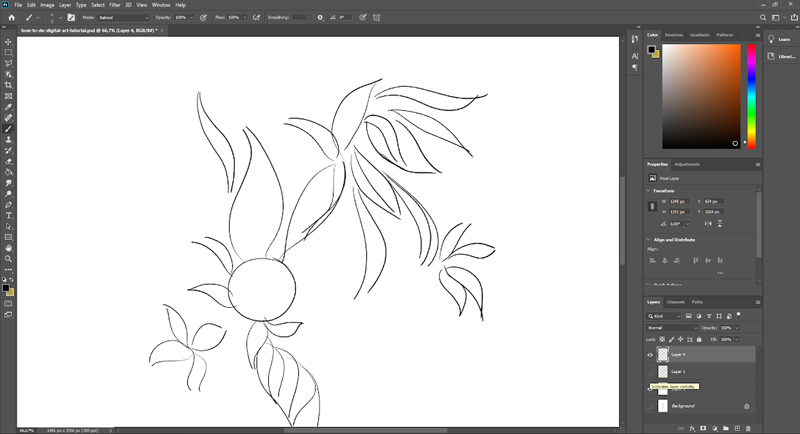
For your first digital artwork, it can be helpful to draw with pen and paper first. Start by sketching your ideas on paper to get an idea of what your design will look like. You can use these sketches in your digital art or for inspiration to map out your ideas.
Work on the forms you’ll include in the final piece. Aim to create accurate shapes, but don’t worry too much about the detail or shading. You can fill that in digitally when you switch to your drawing software.
Get an outline and the overall feel or style, but it doesn’t matter if you don’t have all the details planned out.
(If you don’t have a scanner, you can skip this step and get straight into drawing on your tablet. It’s also fine if you prefer to work fully digitally!)
Scan or photograph your design
(Image: Outmane Amahou / Proactive Creative)
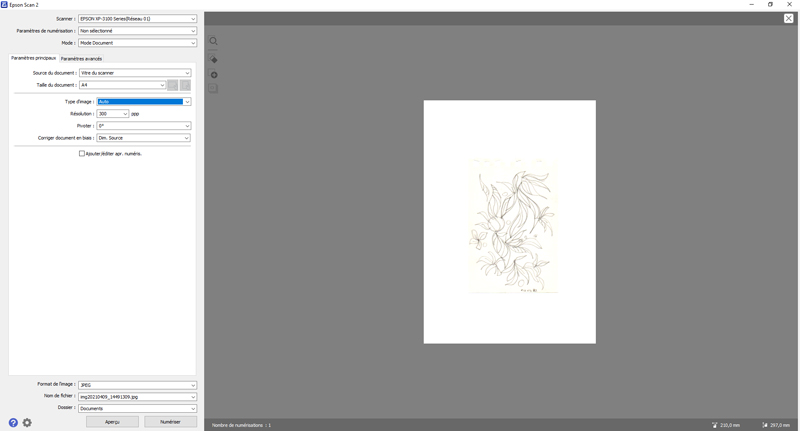
The next step is to scan your sketch and begin outlining it in Photoshop. Once you’ve done that, you can hide (or keep) the pencil sketch layer.
This method is helpful for complete beginners who are new to digital painting. It makes it easy to get started in Photoshop without all the overwhelm, as you have an analog base to work from!
Connect your drawing tablet or your drawing monitor
If you’re still not sure about this, please take your time to read the above section on tablets.
Choose your digital painting software
(Image: Outmane Amahou / Proactive Creative)
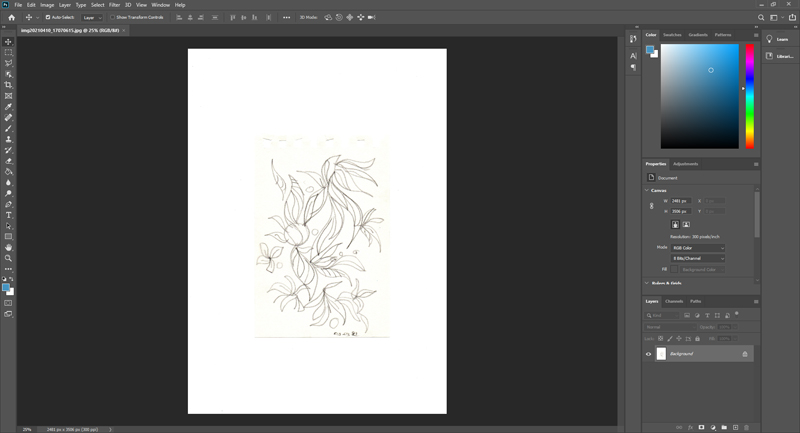
Next, you need to select a digital painting software to create your digital art.
For this tutorial, I’m going to use Photoshop. It offers all the features you need and is commonly used by many artists.
Other software options include PhotoWorks, Krita, Corel, and Luminar. You can take your pick – most of the tools are similar in each app.
Save your artwork
(Image: Outmane Amahou / Proactive Creative)
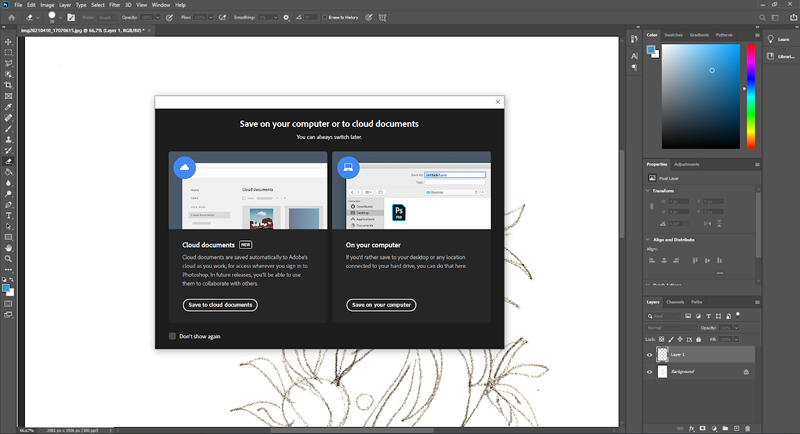
Save your work regularly. This step is very important in order to avoid losing hours of work in case the program crashed
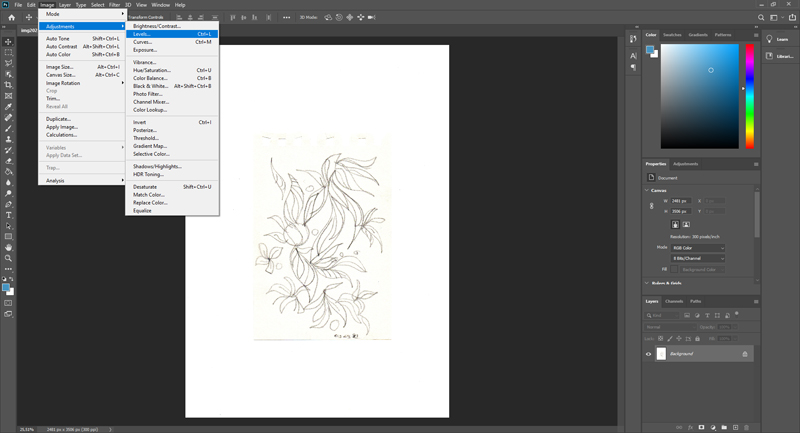
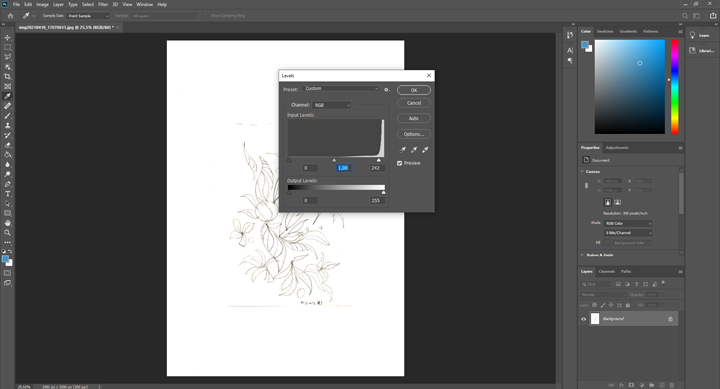
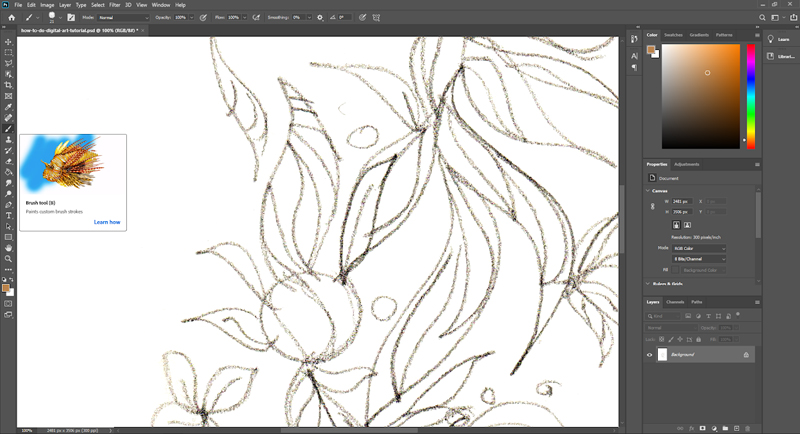
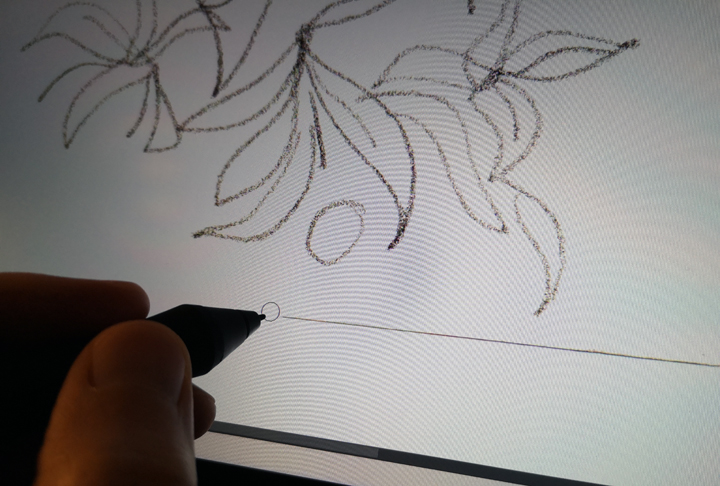
Adjust the brightness and contrast of your artwork
(Image: Outmane Amahou / Proactive Creative)
(Image: Outmane Amahou / Proactive Creative)
(Image: Outmane Amahou / Proactive Creative)
(Image: Outmane Amahou / Proactive Creative)
Color your design
(Image: Outmane Amahou / Proactive Creative)
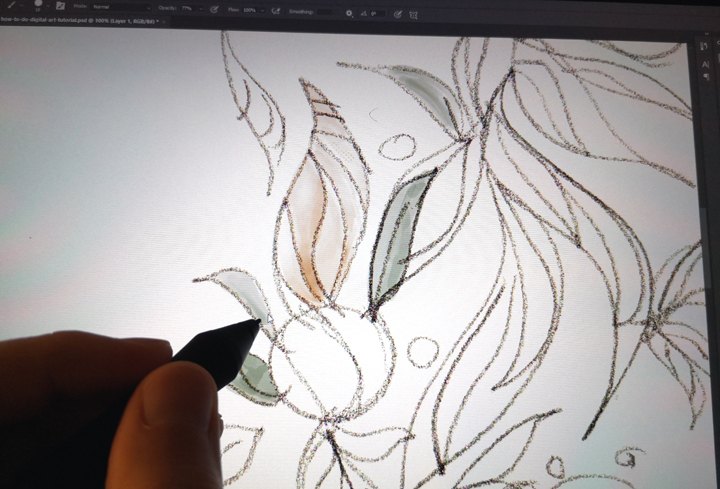
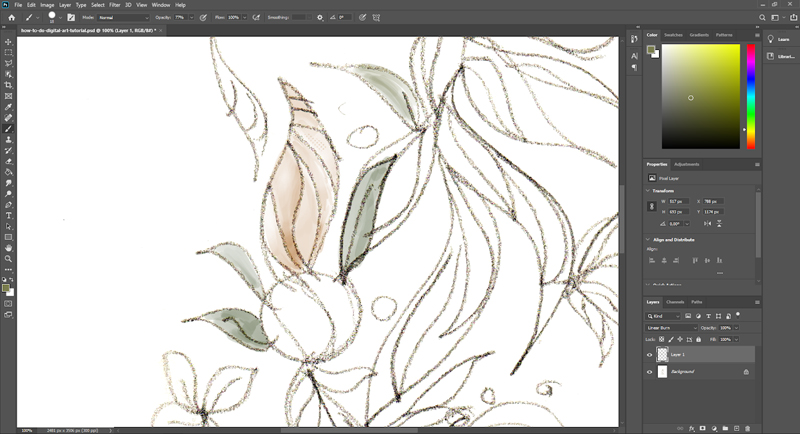
Now, you’re ready to add colors to your design! Create a new layer and start with the basic colors of your drawing. You can add shading and highlights in the next step.
Add extra layers
(Image: Outmane Amahou / Proactive Creative)
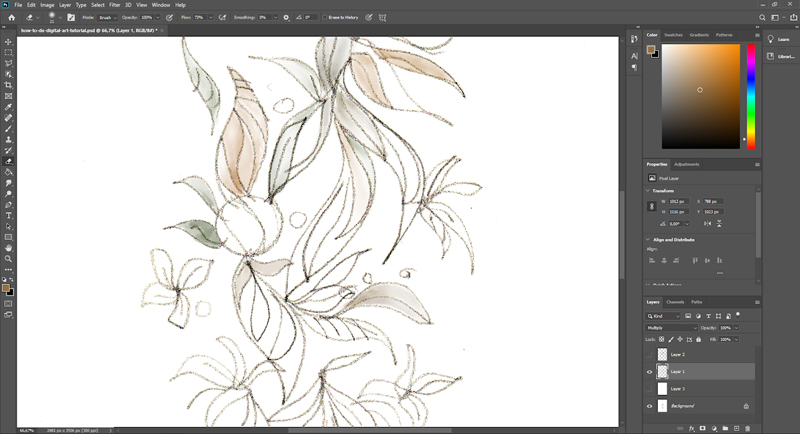
It’s time to add in those details! For this step, you’ll need to make another layer with the ‘new layer’ button. Then, you can start to work on the highlights, shading, and shadows.
Each time, create a new layer so you can make changes without affecting what you’ve done so far.
(Image: Outmane Amahou / Proactive Creative)
When working on the shadows and highlights, keep in mind where your light is coming from. If you are consistent with the light source, your painting will look more natural.
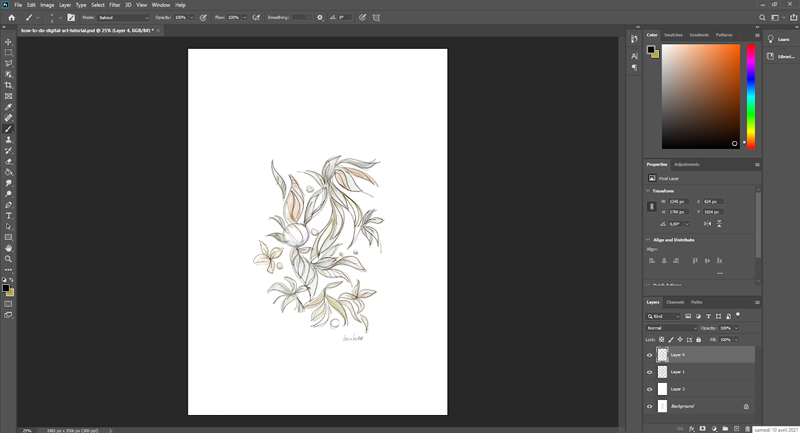
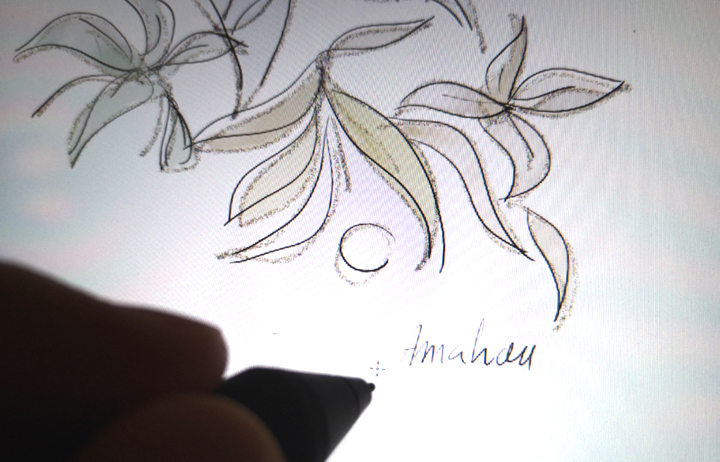
You can build up the color to make the final effects. Now, you can also start to blend colors by using the Eyedropper tool or different brushes.
(Image: Outmane Amahou / Proactive Creative)
(Image: Outmane Amahou / Proactive Creative)
(Image: Outmane Amahou / Proactive Creative)
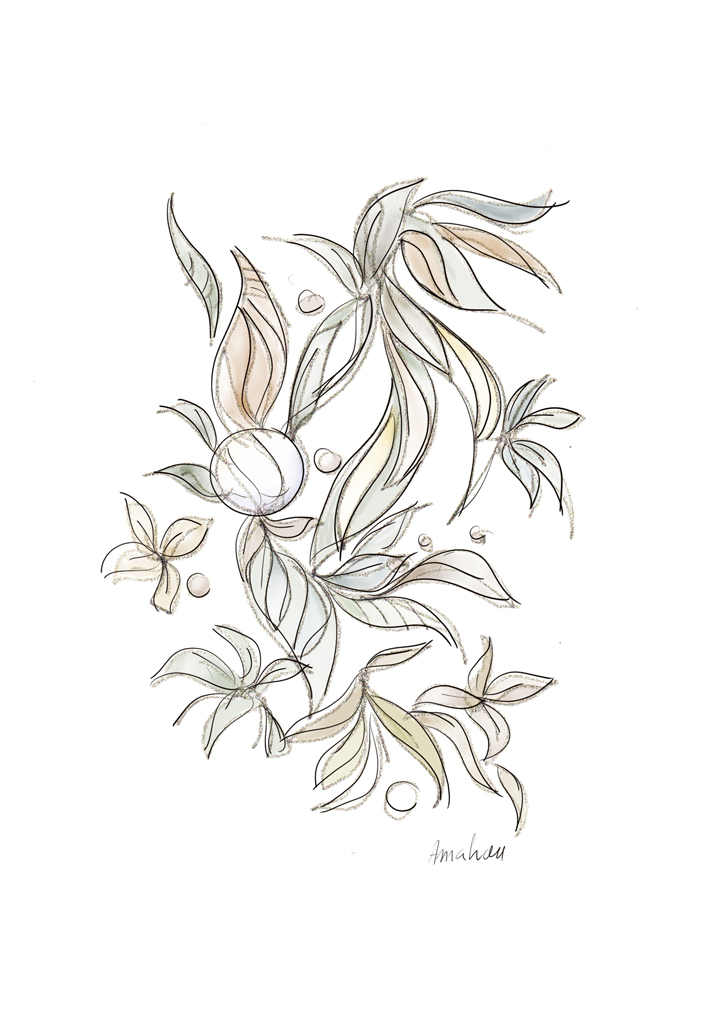
Once you’re finished, you can export your artwork! Tada!
Getting started with digital art step by step
By now, you know all the tools necessary for digital art. So next, you want to learn how to start drawing digitally.
In this section, I’ll share tips and a guide on digital painting step by step.
Watching digital art tutorials is an excellent place to start. It will give you a great overview and an idea of what you can create within your chosen software.
You’ll discover the various tools and brushes and how to use them. Look out for tutorials specifically for beginners for a simpler introduction. You don’t want to get overwhelmed on your first attempt.
Choosing a handful of brushes and tools and get the hang of them. Master these tools so that you feel confident with the digital painting technique. Then, and only then, should you move onto something new!
Starting slowly but surely is the best way to enjoy yourself and learn step by step!
How to get better at digital painting
Sketch regularly
As with any skill, practice makes progress. Never aim for perfection because no one is perfect, and you’ll just get disappointed.
To make sure you’re consistent with your new hobby, plan a regular time for sketching. I recommend blocking out time in your calendar, so you don’t find excuses.
The more often you draw digitally, the quicker you’ll improve. So, aim to make it a habit and hold yourself accountable!
Regular sketching is good both for your practical skills and your creative process. You’ll come up with new ideas and never run out of inspiration. Because the more you create, the more confident you will become.
Don’t be scared to make mistakes, either! You can learn from them and perhaps even discover a new technique or an interesting effect. It’s all part of the growing process as an artist.
So step out of your comfort zone, challenge yourself, and try new things. You’ll be amazed by the results!
Develop your sense of observation
Every artist needs to work on their sense of observation. It’s essential so you can recreate realistic, vivid images of people, animals, and the world around you.
Try to get into the habit of slowing down and paying attention to your surroundings. Take the time to notice the little things, for example:
- Movement
- Facial expressions
- Relationships and interactions
- Emotions
- Light
- Shade
- Form
When you pay attention to these details, it will show in your artwork!
Understand composition
It’s just as important to understand art fundamentals when you’re doing digital painting. The basics like composition, color, and perspective aren’t only for traditional art.
Composition refers to how you arrange the elements on the page. Understanding how to compose an image can make all the difference in the result. It’s what sets a powerful, moving painting apart, while others lack that special touch.
You should learn some key techniques, from symmetry and balance to the Rule of Thirds.
If you want a good beginner guide to composition, check out How to Draw What You See by Rudy De Reyna. Although it covers drawing by hand, the same principles apply to digital painting.
Understand color theory
How you use color in your artwork is crucial, so you need to consider it carefully.
Colors provoke a psychological reaction, affecting us emotionally. As a result, the colors you use in your artwork will influence how people experience it.
Once you understand color theory, you can achieve harmony, balance, contrast, and more. You can play with the colors, create jarring images or evoke a specific response.
I’ve reviewed the best books on color theory here. Browse through and pick up one or two to develop a deeper understanding of how to color digital art.
Understand perspective
Perspective is another essential skill to master if you want to be a talented digital artist.
Learning to paint in perspective will make your art look realistic and accurate. It’s all about how you represent your subjects on the page (or digital canvas!)
You can discover this art fundamental by reading these excellent books on perspective.
Digital art tutorials
If you’re ready to learn more about digital painting, online tutorials are your best resource!
You can find hundreds of tutorials, including demonstrations of specific techniques or tools. YouTube has the best variety of tutorials and lessons on digital art.
Sycra is one of the best YouTube channels for aspiring digital artists. There are all sorts of videos to choose from to help you get started and continue to improve. You can learn about composition, anatomy, drawing methods, and more.
If you want to learn more, Skillshare has some great courses at affordable prices.
The Wrap Up
Hopefully, this guide will make you more confident to try out digital painting!
It’s not as overwhelming or scary as it seems. Just like anyone can pick up a pen and pencil, anyone can draw and paint in Photoshop!
With practice, an open mind, and determination, you can become an expert digital artist. Plus, you’ll have a lot of fun along the way.
Now you know all the tools and software you need, and you’ve got some great tips to help you get started. If you have any comments, you can post them below. And let me know how you get on with your first attempts at digital painting!
For more tips, tutorials, guides, and reviews, follow me on Pinterest!
This post contains affiliate links. If you make a purchase, Proactive Creative may receive a small commission at no additional cost to you.


Hi, I use Corel’s Painter Essential 7. Will that do?
Hi Ruthie,
Yes, It will work also.
Good luck